

How To Shoot Video On Iphone
You don't need a fancy production setup to shoot amazing videos. Here's how to create stunning, professional-looking videos with just an iPhone.
If you're setting up to film an online course or webinar for the first time, you probably have a lot of questions about your equipment.
-
What kind of camera do you need to create your best video?
-
Should you hire a filmmaker to help you?
-
How are you supposed to budget for a camera before you've even made your product?
Hold up — before letting the self-doubt roll in, we're here to reassure you that you can start shooting video with what you already have.
That is, if you're one of the 728+ million iPhone users.
Whether you're working on creating your next profitable digital product or promoting them with video marketing strategies, you can capture professional-quality video footage with your iPhone.
Today, we'll show you how to record amazing videos using nothing more than your iPhone.
More specifically, we share details on making the most of the camera settings on your iPhone, avoiding common pitfalls, and shooting professional video on your iPhone by following some key tips and tricks.
Let's quickly dive in, so you can see how doable this is.
How to shoot pro-quality video with your iPhone
With Apple's iPhone boasting one of the best cameras of any mobile device on the market, it's worth getting to know your iPhone's video and camera settings. The more you get to know each camera setting, the more you can improve the quality of your video recordings.
So, to help you do this, let's walk through specific camera settings and functions on your iPhone's camera before applying them to real-world video recording situations.
Sidenote: While some of these functions work automatically or may not have a video-specific application (like the first section below on burst mode), we'll provide a brief overview of what the feature does, so you're better equipped to navigate your iPhone's camera settings overall.
Burst mode
If you're looking to capture fast-moving subjects, your iPhone's burst mode is the way to go. It captures 10 photos per second in a quick "burst," so you don't miss a moment of action in your shot.

To take photos in burst mode, just tap and hold your finger on the shutter release button. As long as your finger remains on the button, your iPhone will capture the series of action shots.
If you have an iPhone 11 (or newer model), press the shutter button and drag it to the left towards the square displaying your last captured image.
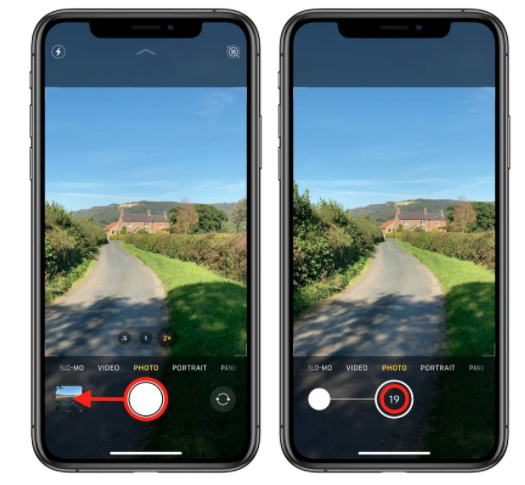
From there, your iPhone displays one image and hides the rest, so you have to dig a little to view the whole series. To view your captured burst photos, open "albums" in your photos app and scroll down to the "bursts" folder.

You can then select your favorite action shot from your series of captured burst mode images.
Image stabilization
When it comes to keeping your shot steady, you have two options: a tripod, or your iPhone's built-in image-stabilization feature.
Your iPhone's built-in image stabilization feature is automatically engaged and is excellent.
If you have the iPhone 7 model and beyond, there's optical image stabilization for both photos and videos, which means the hardware lets you use exposures three times longer than previous iPhone models while preventing camera blur.
Of course, your image results vary depending on a range of factors, like how much unwanted camera motion is in your shot, what resolution you're shooting at, and whether your goal is to shoot stills or record videos.
But, generally speaking, the hardware is a handy built-in tool that eliminates slight hand motions when shooting video or still images.
The new iPhone (iPhone 12 Pro Max) includes sensor-shift optical image stabilization — which is technology that moves the image sensor around inside the camera to offset shakiness. So if you're an iPhone 12 Pro Max owner, your stabilizer is good to go for quality video recording.
For those without the new iPhone 12 Pro Max, it's worth investing in an external stabilizer, like a tripod or mount, for total video recording stability.

As for when to use a tripod or mount, look to our next tip.
How — and when — to use a tripod
There's an easy trick to remembering when you should use a tripod for recording video.
Always use a tripod.
Seriously, you should use a tripod in virtually all situations unless you have a good reason not to.
One of the best ways to think about setting up your shots is to minimize how much work your iPhone camera has to do.
Basically, you should adjust the elements of your scene — like figuring out your light source — to be as close as possible to your desired finished look.
Although you can adjust some of your camera settings in post-production (by using editing apps), it's better to do as much of the work in the scene, before recording your iPhone video, and as little as possible relying on your iPhone's camera function.
This is especially true of image stabilization, so if you need a steady shot, use a tripod before you start shooting video.
For a decent iPhone tripod, check out this Ulanzi phone tripod or this desk phone holder from Aduro to hold your iPhone camera.

Now that you have your stability under control, let's talk lighting.
Exposure
Exposure refers to how exposed, or bright, the light source in your shot is.
There are three main parts to exposure, often called the exposure triangle:
-
Shutter speed - the speed that your iPhone's camera curtain opens and closes, which determines how long light is allowed in
-
Aperture - mimics the way the human eye sees and controls the amount of light that passes through the lens to the sensor, set by the f-stop number
-
ISO - how sensitive your camera's sensor is to light, set by the ISO number

Using the exposure triangle, you can enlarge or reduce your iPhone's camera settings to control how bright or dim you want your shot. Shots with too much light source are overexposed, whereas shots that are too dark are underexposed.
Check out the exposure differences between images that are under-, over-, and correctly exposed.

If you want to get into the granular details, you can check out tools like this exposure calculator, which lets you compute the difference between two sets of shutter speed, f-stop (which controls aperture), and ISO settings.

But OK. That covers some of the basic theory behind light source exposure. Let's bring your shooting and video recording into practical terms.
How to shoot in oversaturated and low-light conditions
Nothing ruins a shot faster than too much or too little of a light source. Exposure problems are among the most common pitfalls you're likely to encounter, so it's important to understand how to shoot video in a variety of lighting conditions.
The exposure settings on your iPhone's camera can be set automatically, but you can also adjust the exposure manually.
To do this, frame your shot and then tap the subject of your scene. This will focus your shot on that point.

You'll also notice that when you tap to focus on your subject, a sun icon appears to the right of your focus point. This is where you control your exposure settings for better image quality.
Tap the sun icon to access the exposure slider, then move it either up or down to increase or decrease the f-stops that control your iPhone camera setting's aperture.
Pretty simple, right?
Now let's move on to some things slightly more technical.
Frames per second
You can also adjust the frame rate, or frames per second (FPS), camera setting on your iPhone's camera. As explained in its name, FPS is simply how many frames of video are shot per second.
Although video recordings appear smooth, they're actually made up of multiple individual images that create the illusion of motion when played in sequence.
For a reference point, the human eye can register 10–12 FPS as individual static images. The standard for movies and TV shows is 24 FPS, and for television, it's 30 FPS. Anything higher than that is mainly used to create slow-motion video or video game footage.
All this to say, FPS really comes into play when you want to shoot in slow-motion.
If you want to adjust the frame rate of your video on your iPhone, just go to your Camera settings and tap the "Record Video" and "Record Slo-mo" menu options to specify the resolution and frame rate of your video recording.

For those who own an iPhone 11 Pro (or newer with iOS 13.2 or later), you can adjust your FPS on the fly by launching your camera app and swiping left or right below the viewfinder.
This is where you can select "Video" or "Slo-mo," and video resolution and frame rate labels appear in the top-right corner.

Technology is sweet, right?
Now for framing your shots to make high-quality videos.
Gridlines
Most digital video cameras have a feature that overlays gridlines onto your camera view.
These gridlines, which create nine boxes over your shot, don't appear in your actual images or video recording. Instead, they give you a useful way to compose aesthetically pleasing compositions for better video shots.
More specifically, gridlines are great for using the "rule of thirds" to frame your shots.
If you're unfamiliar, the rule of thirds is simply when you divide your shot evenly into thirds, both horizontally and vertically, and place your subject at the intersection of those dividing lines or along one of the lines itself.
It's basically a way for filmmakers to compose a strong, balanced image and great video shot.
For instance, here's a shot using gridlines and the rule of thirds, where the shed (the subject) is at the intersection of the gridlines.

As you can see, the trees take up the top two-thirds of the background, and the snow fills the bottom third.
Here's another example of a great video shot, where the background is split into three main parts — the sky, plain snowy ground, and rocky ground — and the subject is in the right third of the shot.

Even if you don't have a main subject to shoot, gridlines are super helpful for creating dramatic images and amazing video shots.
For instance, landscapes can be quite dramatic if you use the lowest horizontal grid line as your horizon point, like so:

Regardless of how you use the rule of thirds, gridlines are great to use as a general guideline for framing shots, whether it's in still photos or video recording.
With the basics of gridlines out of the way, let's quickly walk through the application on your iPhone.
How to use grid lines to compose your shot
First things first. To use grid lines to frame your shot, you need to enable the feature in your iPhone camera settings.
To enable gridlines, head to your iPhone's Settings app and scroll down to tap on "Camera". From there, toggle on the "Grid" switch so it's green.

Now you're ready to compose your great video shot using the grid lines.
If you're producing an online course, you'll probably need to shoot a few scenes where you (or your presenter) are centered in the video recording frame.
Simply frame your shot so that the two center-most gridlines neatly frame the presenter of your video recording. (If you can, find a friend who is similar in height, and use them to help frame your shot.)
Check out how successful entrepreneur Becky Mollenkamp featured a testimonial video of Sarah, a member of her Gutsy Boss Club, centered in the middle of the video recording shot.

Similarly, if you're planning to use video overlays as part of your instructional videos, just make sure that there's enough space to the left or right of your presenter:

(By the way, if you want to learn more about quality video composition, check out this guide on how to record video for your online course.)
The main takeaway is, once you enable your iPhone's gridlines, you can frame beautiful and engaging shots in a variety of ways and use them in your digital products for sale.
Your iPhone camera settings aren't your only options for producing professional high-quality videos, either. Read our final tip to go the extra mile when polishing your great videos and photos.
Going beyond the basics of the iPhone camera
So far, we've looked at how to achieve sleek, polished, professional-looking results using just the camera settings on your iPhone.
While these tips might be enough for most iPhone videographers, if you want more control over your video production, consider using video editing apps, like Camera+ 2, which let you go beyond your iPhone's built-in camera settings.

Camera app Camera+ 2 has camera setting features that allow you to manually adjust most of your iPhone's camera settings as if it were a DSLR camera.
Virtually every camera setting can be adjusted further than the standard camera app will allow, including shutter speed, exposure, and white balance.
Camera+ 2 can also be used to take long exposures. And its "Macro" mode is a great way to fake greater depth of field by focusing on elements in the extreme foreground of your shot.
Both of these camera app features will level up your filmmaking from amateur to professional video quality.
Alternatively, you can check out the Focos camera app, which also brings DSLR-like photography to your iPhone.

Focos also serves as a video editing app and lets you get similar effects as large-aperture professional video cameras on your iPhone, and even focus your images after the fact in post-production.
Another great option is the camera app FiLMiC Pro, which is also designed for iPhone video filmmakers, novice and professional video makers alike.

FiLMiC Pro's camera app turns your iPhone video camera into a professional video camera that captures cinematic high-quality video footage. The camera app is also designed to support external microphones and lens adapters, although it's powerful enough to stand on its own.
Camera apps aside, though, the gist of it is this:
You can tap the power of iPhone camera apps and video editing apps that let you take your videography and photography to the next level of control. With enhanced camera settings and features, you can turn your iPhone videos into professional videos all from your mobile device.
Professional results on an amateur budget
You don't have to be a pro filmmaker to produce cinematic quality videos. You just need some pro-level insight for how to make the most of your iPhone built-in camera settings and features.
In a nutshell:
-
Burst mode lets you take 10 shots in one fell swoop to capture your ideal action shot.
-
Image stabilization is increasingly improving as iPhone models advance, although using a tripod or mount provides the best stabilization for video recording.
-
Use your iPhone camera's exposure settings to get the right amount of light source on your subject and background.
-
Adjust your frame rate, particularly if you're doing slow-motion video recording.
-
Enable your iPhone camera's gridlines and use the rule of thirds to frame strong, balanced shots.
-
Enhance your iPhone photography and videography with camera apps and editing apps that let you access advanced features of a DSLR camera.
Ready for action? We're standing by, on your proverbial set, rooting you on.
How To Shoot Video On Iphone
Source: https://www.podia.com/articles/how-to-shoot-professional-quality-video-on-your-iphone
Posted by: pattondesten.blogspot.com
0 Response to "How To Shoot Video On Iphone"
Post a Comment